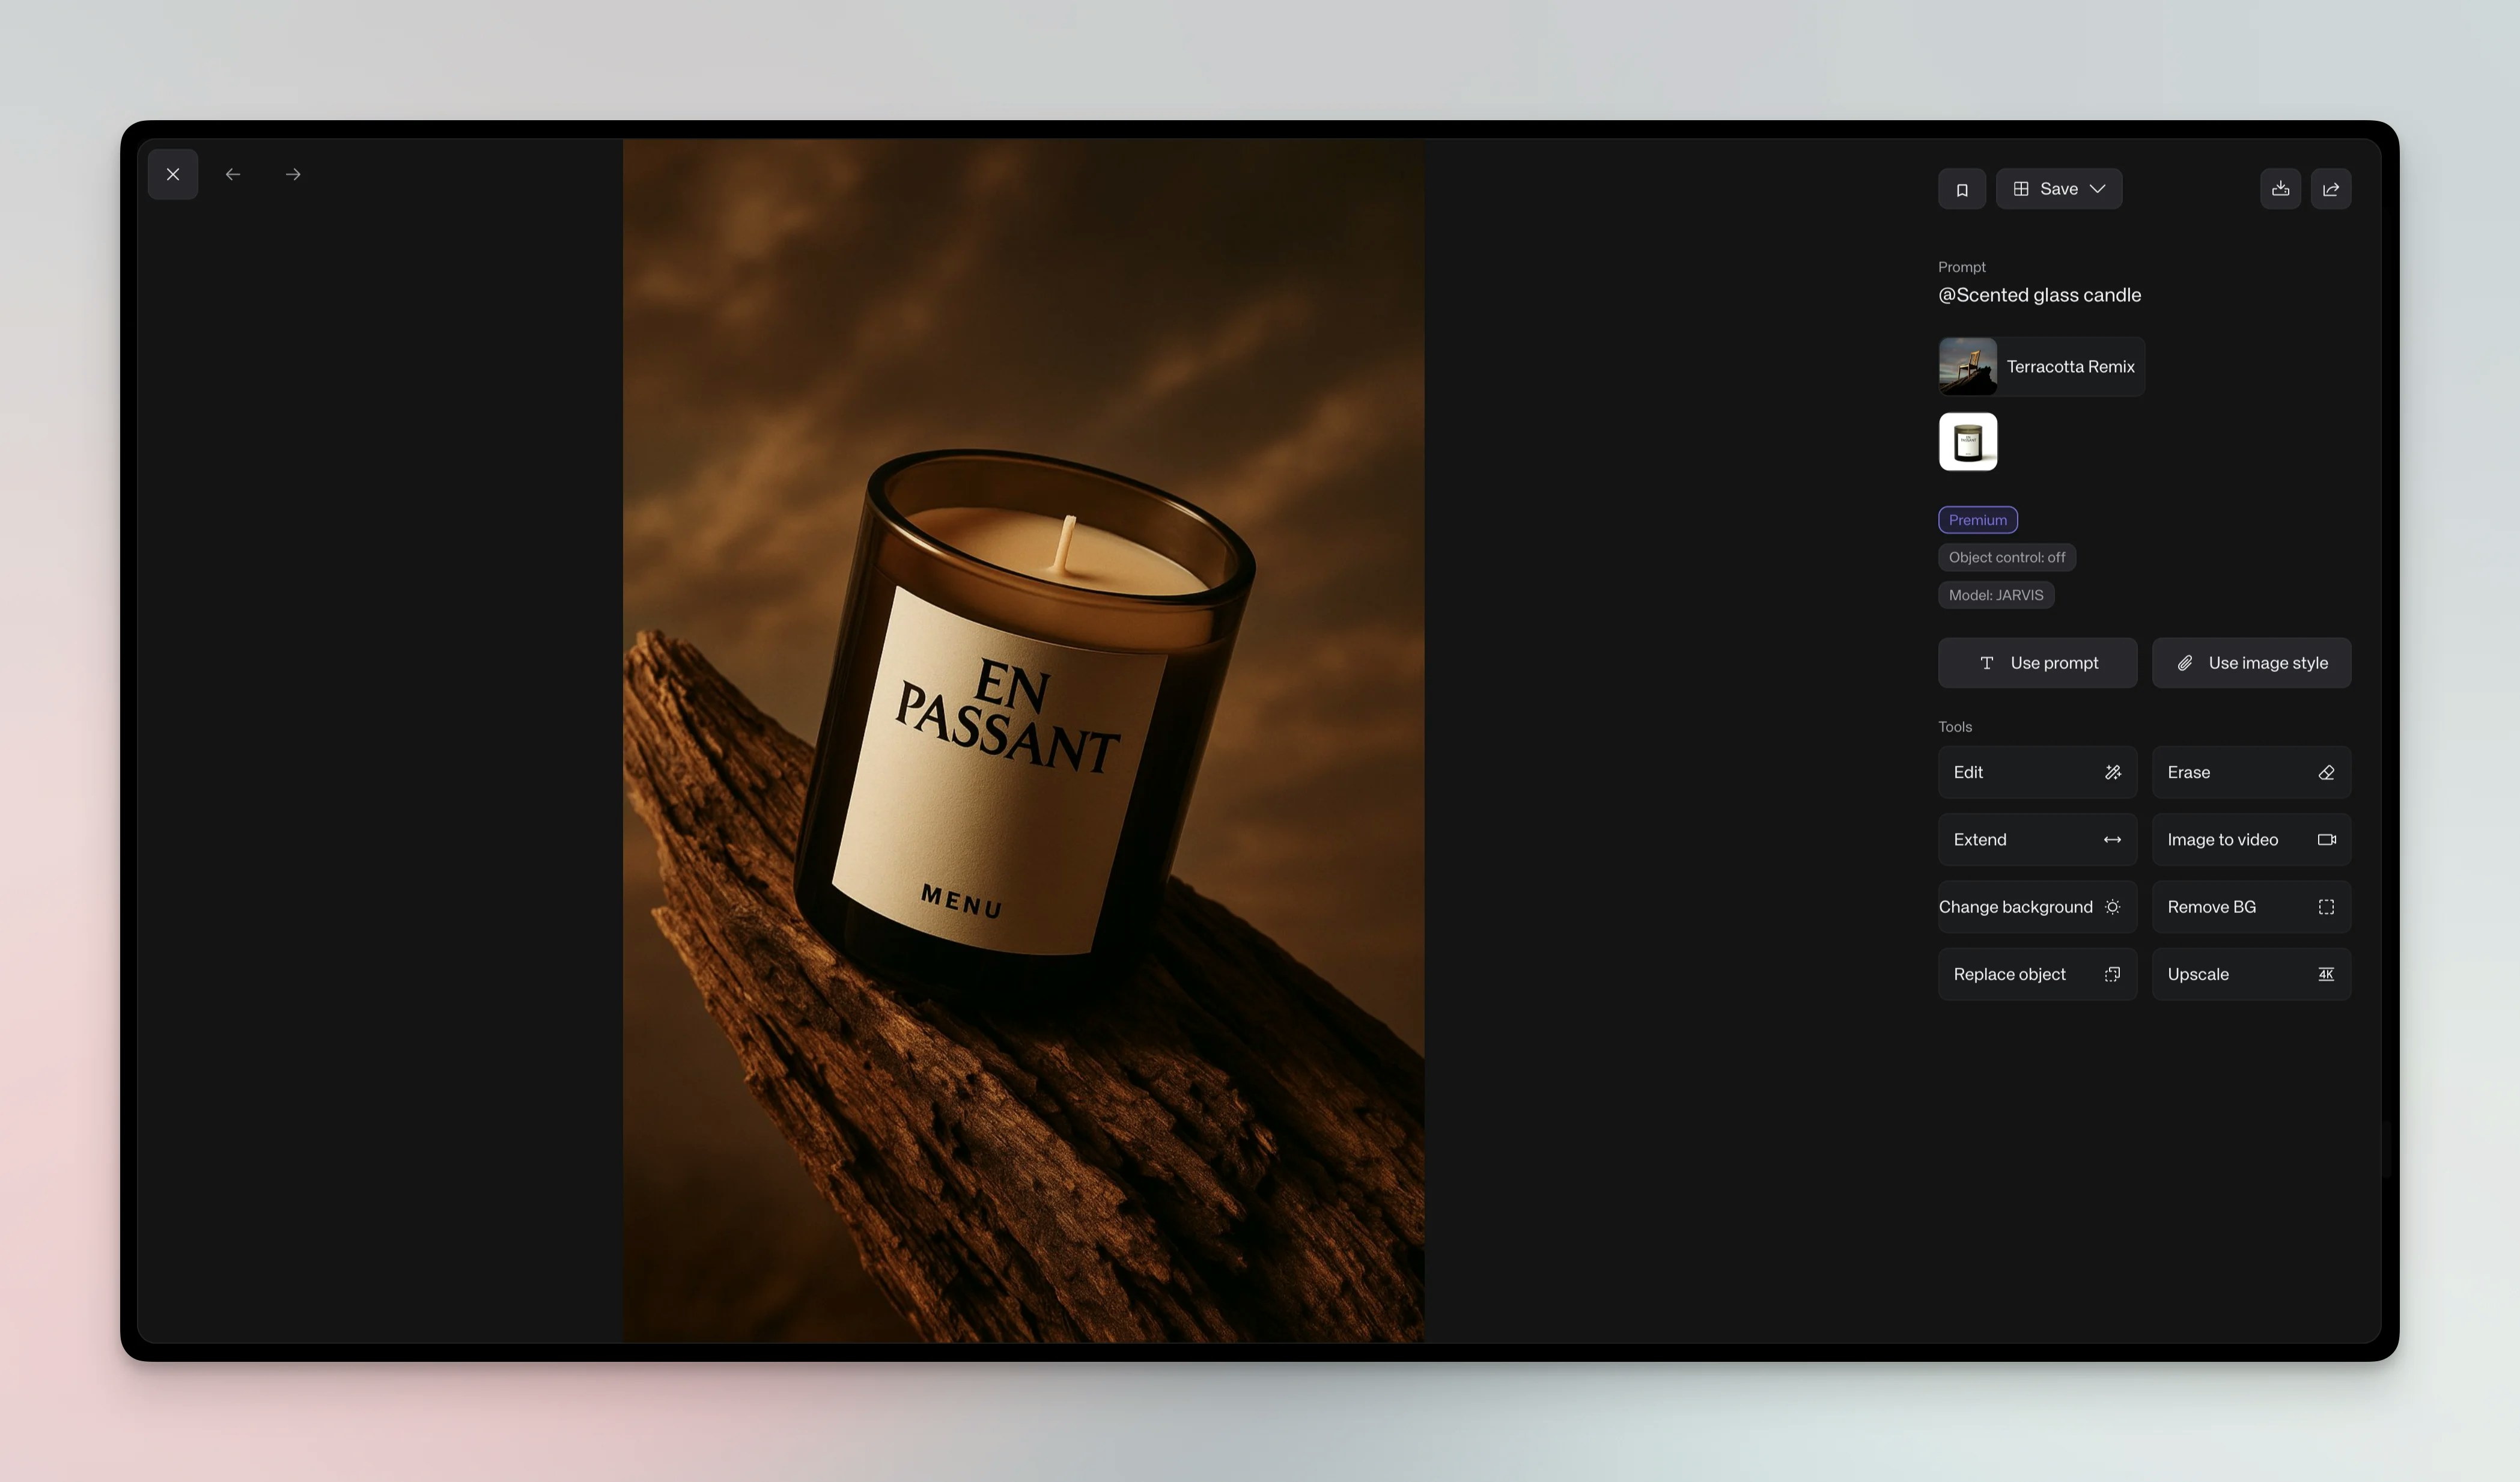
Overview
Studios are pre-built environments that blend lighting, camera angles, props and backgrounds to produce professional results without complex prompts. You can remix studios to fit your brand and save them for team use.Steps
1
Access Studios
In the generator, click “STUDIO” in the prompt input to open the list of available studio presets
2
Select a Studio
Choose a studio that fits your brand and style
3
Add Your Subject
Drop in a product model or type a short prompt. Keep prompts simple; studios
handle most details
4
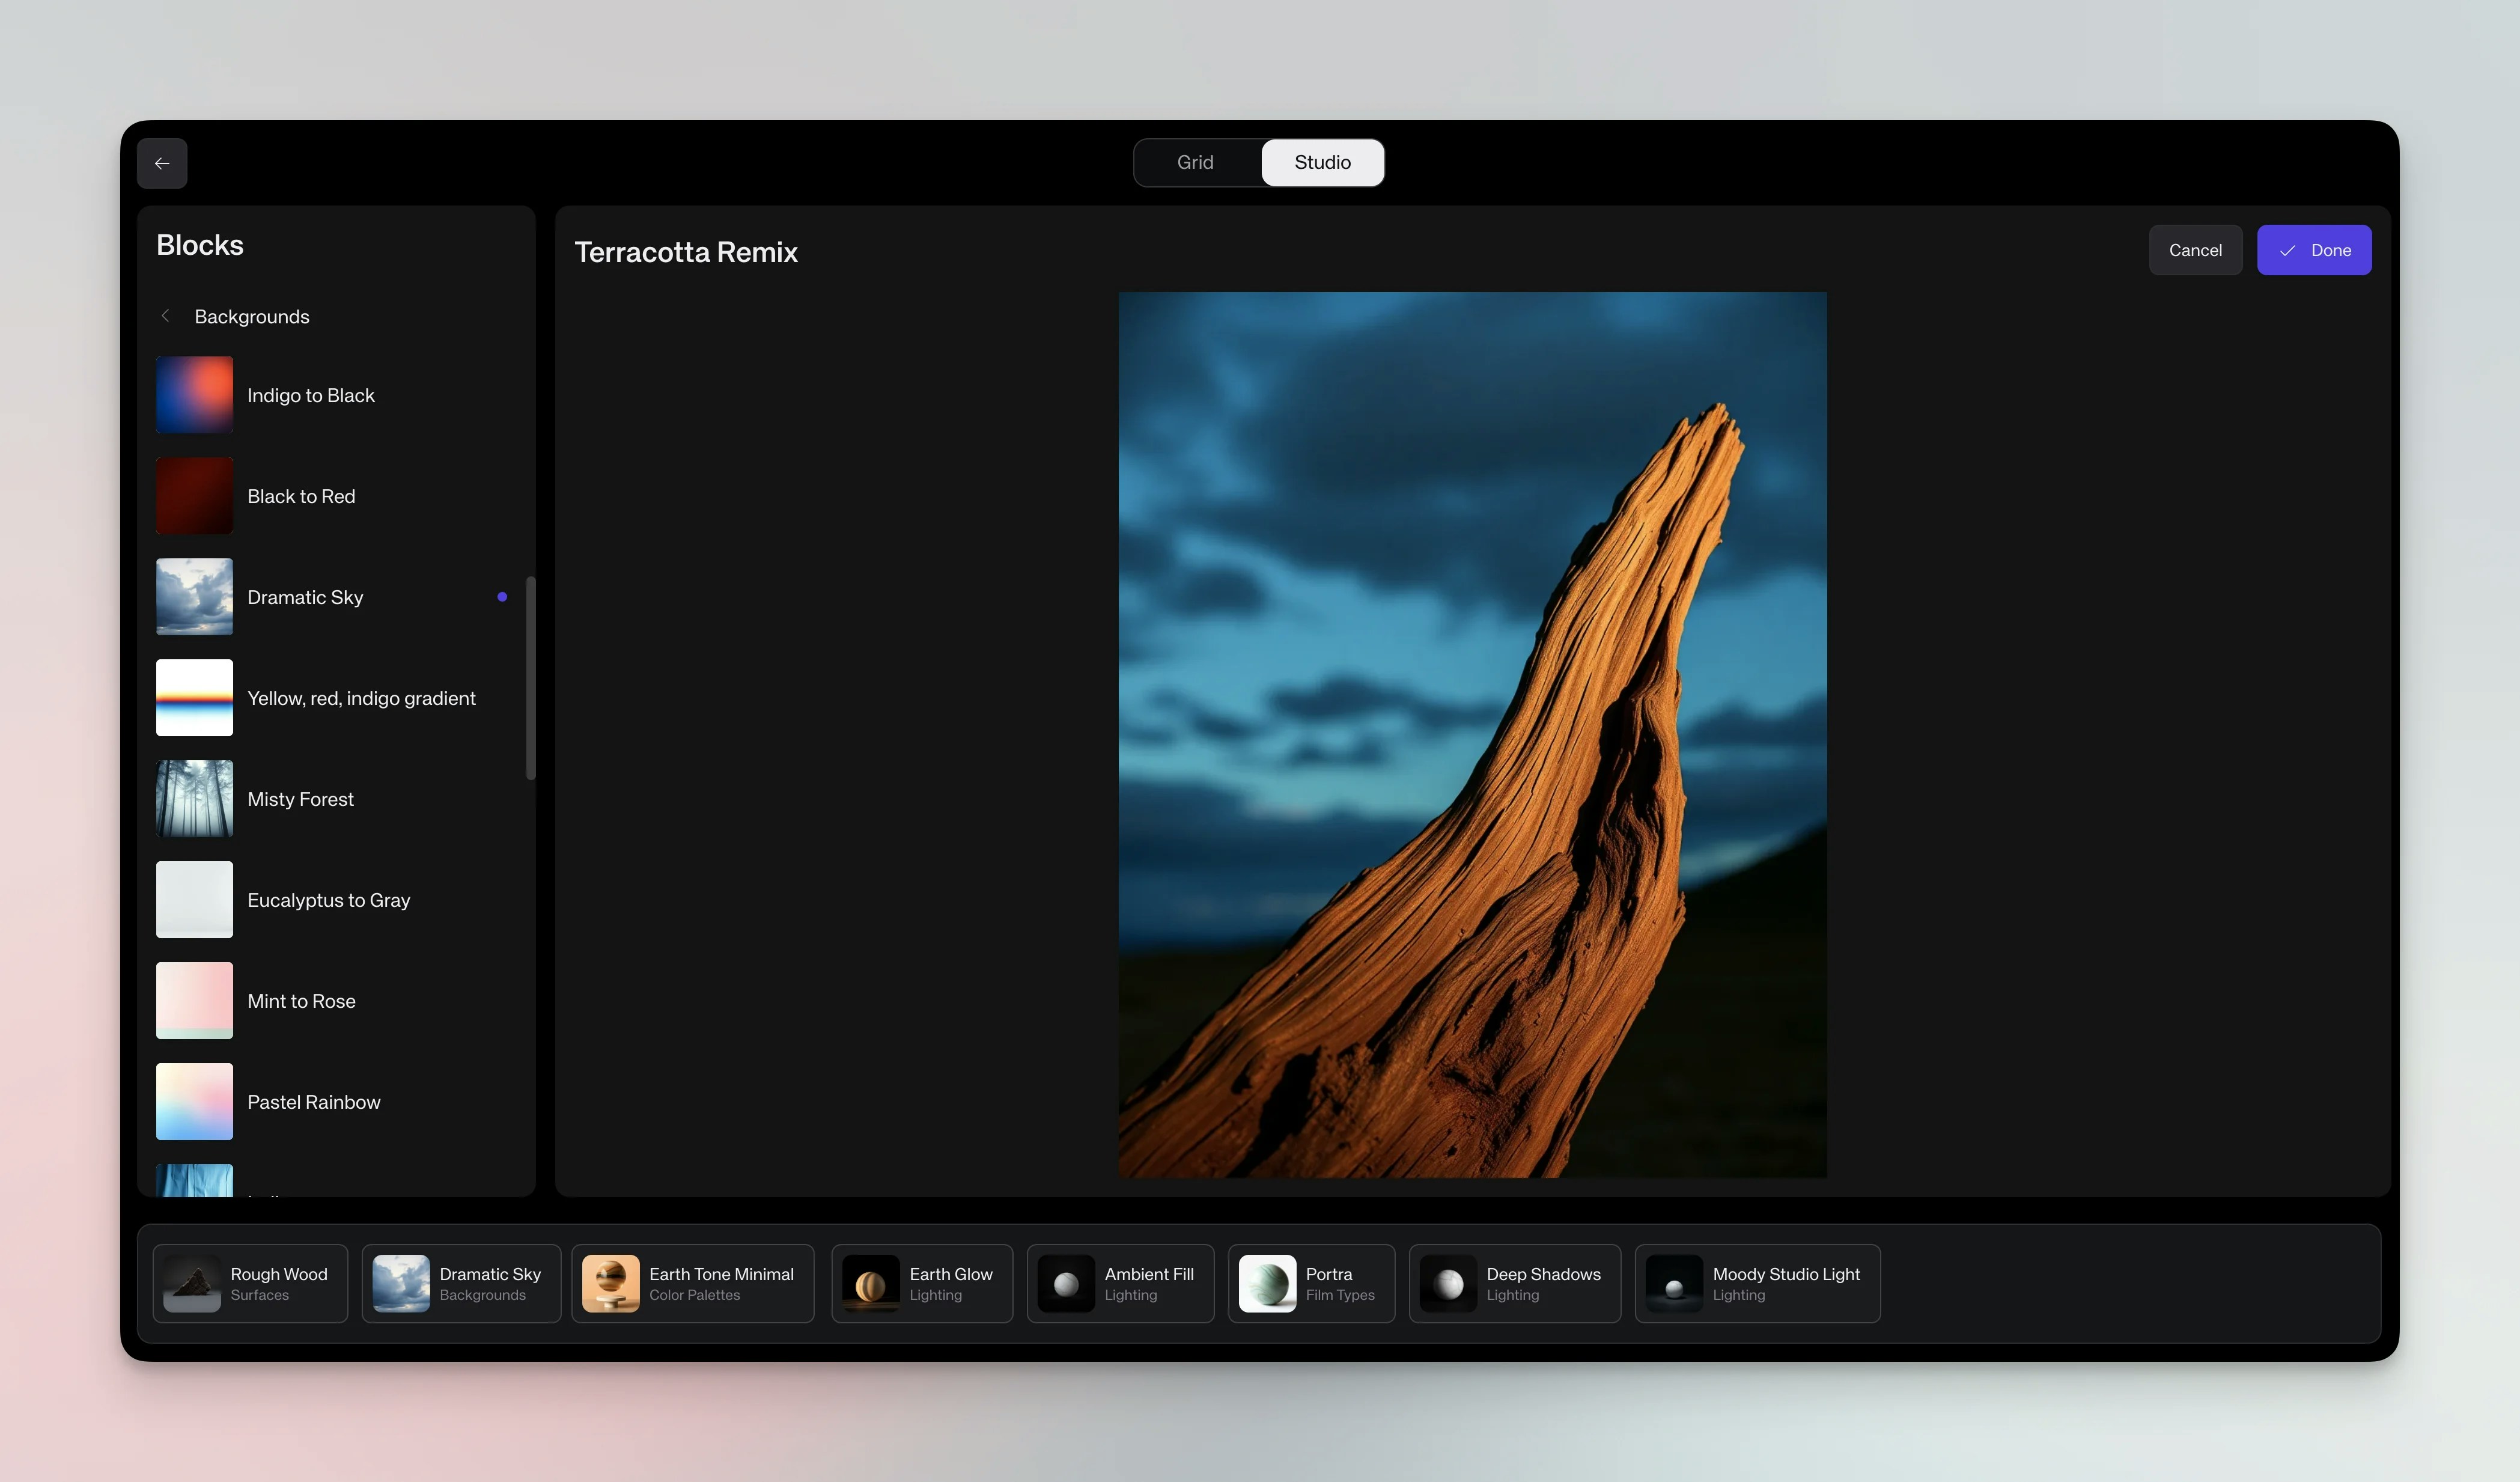
Remix (Optional)
Click Remix to open the Studio editor. Edit blocks such as lighting, camera
angle, props or background. Drag new blocks from categories (props,
lighting, etc.) to customize 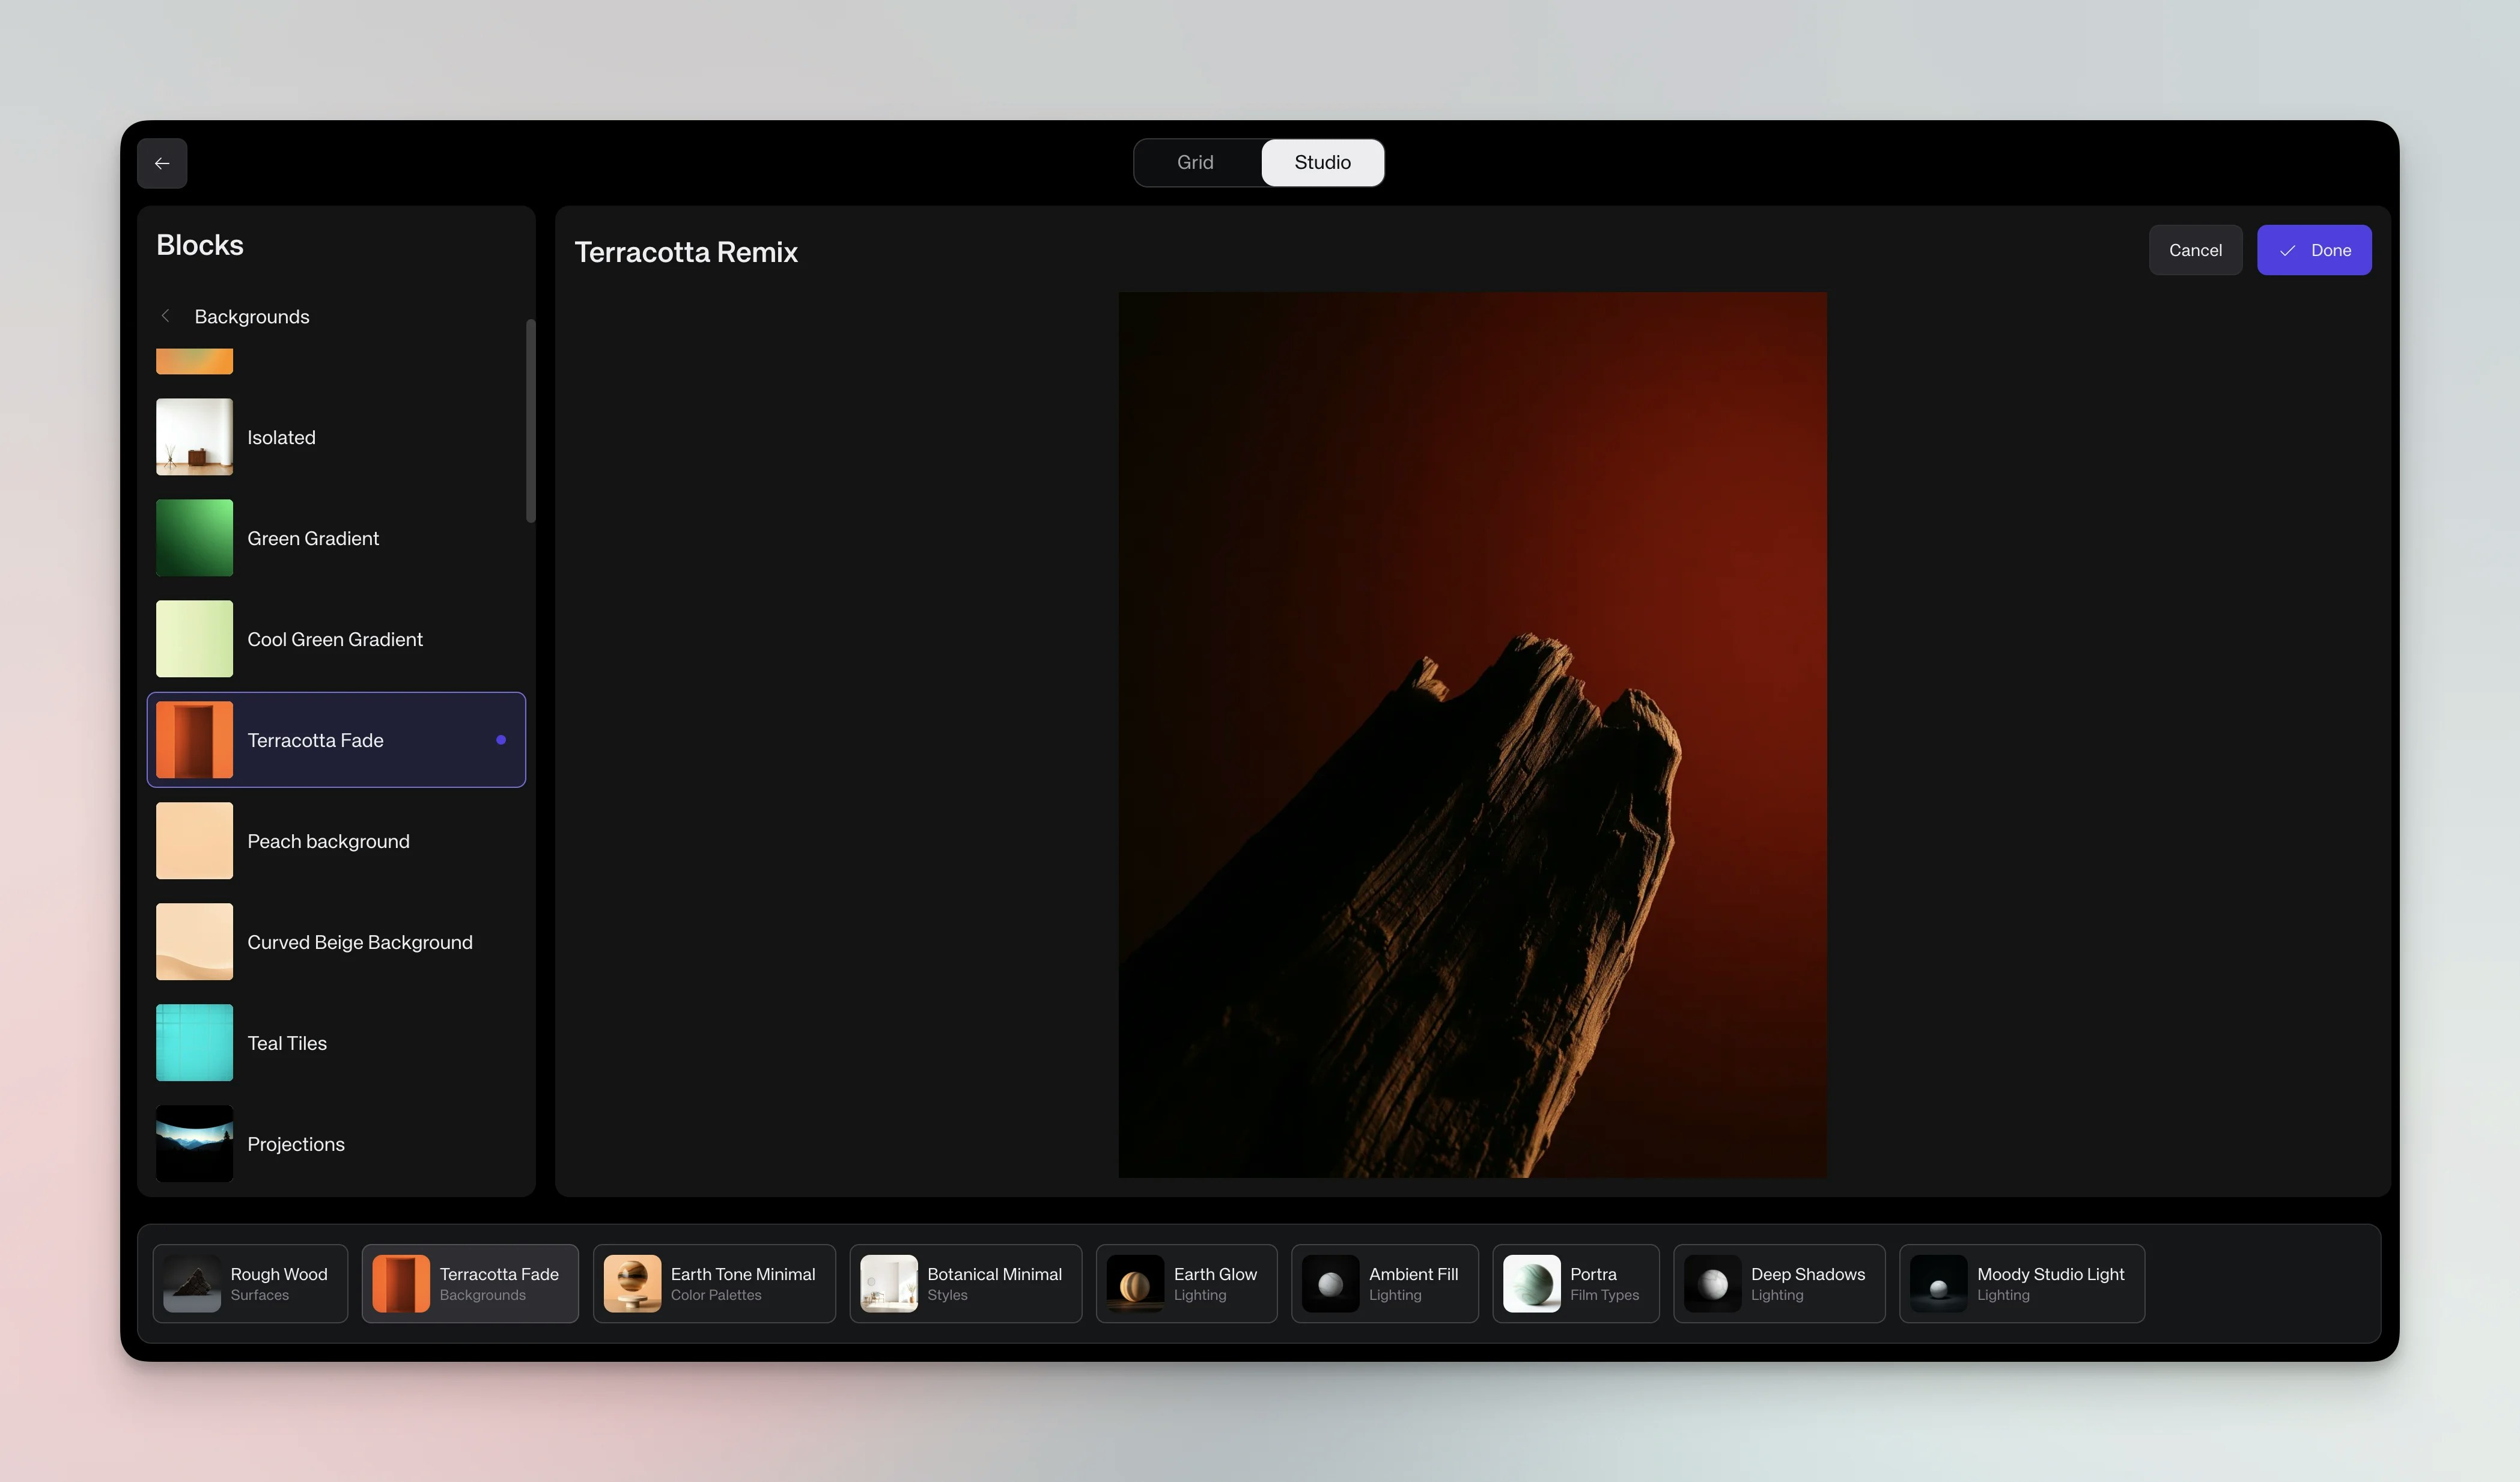
5
Save Custom Studio
After remixing, click Save, name your studio and share it with your
workspace. Saved studios appear alongside presets for future use
Studio editor concepts
Blocks: Studios are made of modular blocks controlling lighting, camera, props and background. Editing: Click a block to replace it; choose options like “golden hour lighting” or “industrial background” to change the mood. Adding: Browse categories and drag additional blocks into the scene (e.g., plants, furniture, textures).Generate with studios
Images: Select a studio, add your subject and click Generate. Four variations are produced; save your favorites.